ERPNext Container Solutions
- Yobitel Communications
- Nov 1, 2023
- 3 min read
Updated: Apr 23, 2024

ERPNext is a modern tool that covers accounting and many other business functions on an integrated platform. Yobitel’s Pre-build ERPNext is a ready-to-use enterprise resource planning (ERP) system. It includes core modules, features, dashboards, and reports required to manage critical business functions including multiple workflows to get businesses up and running quickly for accounting, sales, purchasing, inventory, manufacturing, HR, payroll, and CRM.
The Prebuilt configuration reduces implementation time and costs compared to custom ERP solutions developed from the ground up. Pre-build ERPNext allows businesses to quickly get up and running on a fully functional ERP system that can scale as they grow. Role-based access controls secure sensitive data. Support for multiple companies, currencies, taxes, and locations provides flexibility.
Key Features
Preconfigured modules - Comes ready with Accounting, Sales, Purchasing, Inventory, Manufacturing, HR, Payroll, CRM, and other modules.
Dashboards and reports - Embedded dashboards visualize key data. Common words are Prebuilt.
Workflows - Automate processes for efficiency and consistency.
Access controls - Permission controls secure sensitive information.
Multi-company support - Manage multiple entities in a single system.
Customizable - Open source allows tailoring the system as needed.
Scalable - Flexible architecture scales from small to large enterprises.
Rapid implementation - Pre Configurations accelerate deployment.
Responsive support - Expert assistance for installation, migration, and training.
Method 1: Container images
Prerequisites:
Install docker
Install AWS CLI: https://docs.aws.amazon.com/cli/latest/userguide/getting-started-install.html
Configure AWS CLI: https://docs.aws.amazon.com/cli/latest/userguide/welcome-examples.html
1. After the subscription of ERPNext Container Solutions click Continue to Configuration then continue to launch 2. Below the configuration details you can find Container images, Copy and Paste the following command to authenticate to Amazon Elastic Container Registry and download the container image on your instance

3. To run the containers use the command
For Database: docker run -it --name erpdb -d [Paste the Pulled Docker Image with tag ].
For ERPNext: docker run -it --link erpdb --name erp -p 8000:8000 -p 9000:9000 -d [Paste the
Pulled Docker Image with tag ]
Note: Configuration typically takes 7 to 10 minutes, so please log in after 10 minutes. 4. To get the password use the command :- docker exec -it <Container ID > cat admin_password.txt
5. Copy the Public IP of your instance with 8000 and paste it into your browser
EX: 34.204.82.168:8000
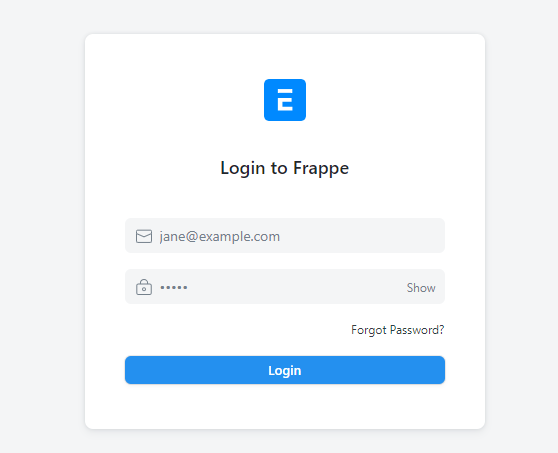
6. The Login Page appears

Enter the User Name as Administrator
Enter the Password as we get from the terminal ( From Step 4)
7. After the Login your application page looks like this and you are ready to configure the ERP application you want

Method 2: Deployment template 1. After the subscription of ERPNext Container Solutions click Continue to Configuration then continue to launch. Select the deployment container and the ERPNext Container Solutions.yaml file will be downloaded 2. Go to your Cloud Formation dashboard and click Create Stack to upload the ERPNext Container Solutions.yaml file.

3. Enter Your Stack Name and Configure the CIDR values as per your Requirements or leave them as the default and click next

Accept the capabilities and click submit

4. Go to the Nested ERPNextcontainersolutions-Cluster Resources and click ERPNext-Cluster

5. Goto the Task and open it You can find the Public IP

6. To get the password go to the Logs page and search for Generated password, Now you can copy your password

7. Copy the Public IP of your task with 8000 and paste it into your browser
EX: 34.204.82.168:8000
Note: Configuration typically takes 7 to 10 minutes, so please log in after 10 minutes. 8. The Login Page appears

Enter the User Name as Administrator
Enter the Password as get from the Logs ( From Step 6)
9. After the Login your application page looks like this and you are ready to configure the ERP application you want

Insights & Support:
For further details about Apache OFBiz and its uses, refer to the ofbiz. apache.org website
We will do our best to respond to your questions within the next 24 hours or business days. For any technical support or query, you can mail support@yobitel.com.
Check our other Containerized Cloud-Native application stacks, such as EKS, ECS, Cloud Formation, and AMI - Amazon Machine Images in AWS Marketplace.


Comments